Hacking Wifis with the Pwnagotchi (2024 guide)
2024-07-10
Preface
When I booked the OSCP course I took the LearnOne package… this included exam attempts for the KLCP and OWSP certifications. The KLCP did not really interest me as it seems to be more about very basic stuff like how to install Kali Linux. However, the OSWP sparked my interest. Wifi hacking… that must be nice. But first we play a bit. 😄
Pwnagotchi
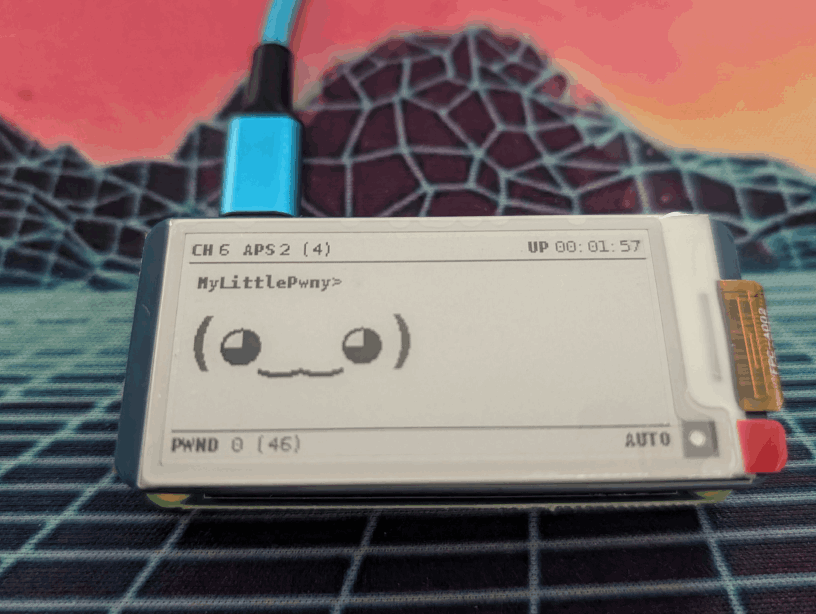
The Pwnagotchi is a Tamagotchi-like thing. But it actually has zero buttons. To keep it fed and entertained you have to feed it WPA handshakes! If it does not see enough networks or handshakes, it gets bored or even sad.
But at least you won’t have to clean up its poop.

What can it do?
It is actually a Raspberry Pi Zero running a full Linux system with bettercap in the background.
It tries to deauth devices from wireless networks it finds, and collects the handshakes when the devices connect back to the access point. All this happens automatically. No need to do anything.
These handshakes can be transferred to a PC to be cracked. One drawback is that it will only work with 2.4GHz WiFi if you are using a Pi Zero 2 W. The Pwnagotchi firmware theoretically supports 5GHz, but the Pi Zero does not. You can use a Pi 4, for example, but you will lose a bit of portability.
Where to buy?
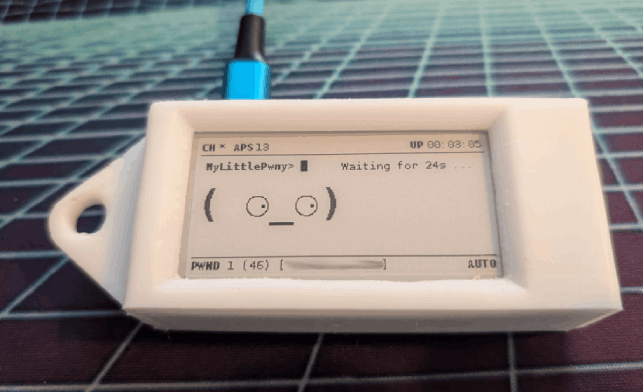
It is a DIY project. However, it is really easy to build. You can run it on just a Pi Zero. If you want one with a screen, you can build one yourself without soldering if you can get a Pi Zero with pins. I recommend using a Pi Zero 2 W. A “normal” Pi Zero W will also work, but there are some newer firmwares that will not work with it. The Pi Zero 2 W cost me 18€.
If you have a Pi Zero lying around and don’t want to buy a screen, you can also open the output of the Pwnagotchi in a browser window while the Pwnagotchi is connected to the PC via USB.
The recommended screen is the Waveshare 2.13inch E-Ink display (not the color version). I paid ~20€ for mine.
You can also add a battery to take it on walks. A commonly used one is the “Pisugar 3 Portable 1200 mAh”. This will give you a couple of hours of battery life, but is quite expensive (~50€). You can also just use the USB port to power it with a power bank.
Firmware
At the time of writing this blog post, the original author seems to have pretty much abandoned the Pwnagotchi. The last firmware release was 3 years ago.
Fortunately, there are a few people who have continued to work on it, adding new features and fixing bugs. The most recent/active firmware at the moment seems to be the one by jayofelony.
Installation and configuration
Installation is actually quite simple. Download the firmware image, write it to an SD card with the tool of your choice, add a config.toml to the boot partition of the SD card before the first boot and there you go!
If you want to change these parameters after your first boot you will be able to find the config.toml file in /etc/pwnagotchi/config.toml after connecting to the Pwnagotchi via SSH.
Here is how I basically set up my config.toml file:
main.name = "YourPwnagotchiName"
main.lang = "en"
main.whitelist = [
  "WifisThatYou",
  "DontWantToAttack"
]

main.plugins.grid.enabled = false
main.plugins.grid.report = false

ui.display.enabled = true
ui.display.type = "waveshare_4"
ui.display.color = "black"
ui.fps = 1

fs.memory.enabled = true
fs.memory.mounts.log.enabled = true
fs.memory.mounts.data.enabled = true
You will need to change the ui.display.type value to match your display. ui.fps = 1 helped a lot with initial clearness of the display for me.
I’ve rarely seen the fs.memory options recommended, but you should definitely set them. In the default configuration, log files are constantly written to the Pi0 microSD card, which slowly wears it out. This setting creates a ramdisk for them. However, this will cause the log files to be erased when the power is turned off. The handshakes will still be written to the microSD card.
All the parameters you can set here (and their default values) can be found in this defaults.toml file.
Connecting to the Pwnagotchi
OK, so you went for a walk with your Pwnagotchi and it collected some handshakes… only from your own devices, of course. How do you get them to your PC?
Connecting the Pwnagotchi to your PC can be a bit complicated. It also depends on your operating system. Here is a guide on how to do it on Windows and here on Linux or macOS.
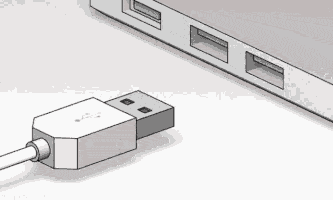
The basic way it works is that the Pwnagotchi identifies itself as a network adapter when connected via USB. Set your own IP address on this adapter to 10.0.0.1 and SSH to pi@10.0.0.2 (default password is “raspberry”). Done! Also make sure that you are actually using the data port on the Pi Zero, as one of the 2 USB micro ports is only for power, not data! When you orient the Pi0 so that both USB ports are at the top, the left one is power only, while the right one (or more towards the middle) is power and data.
Once connected via SSH, you can find the handshakes in /root/handshakes/. Copy them to your PC. To access the /root directory you may need to escalate your privileges to the root user. To do that type sudo su -.
Cracking WPA handshakes
Now for the juicy part. The handshakes are encrypted with a salt. This means you have to crack them, there are no online lookup tables for them like there are for some types of hashes. For best results, use a GPU to crack them. Use a dictionary of passwords that are at least 8 characters long, as this is the minimum length for WPA passwords.
But first you need to convert the .pcap files to just the hashes so that cracking tools like Hashcat and John can understand them. I used hcxpcapngtool to do the conversion.
$ hcxpcapngtool -o hashes.hc22000 ./handshakes/*.pcap
This leaves you with a hashes.hc22000 file to crack. I chose to use Hashcat because I have a powerful GPU and Hashcat makes good use of it. WPA password lists can be found at weakpass.com. For example, the 11GB “Super WPA” password list or, if you want to go all the way, the 134GB “All-In-One-WiFi” password list. This is a huge list, taking about 12 hours on my Radeon 6800 XT at about 1,000,000 hashes per second. Do not even try to do this with a CPU, even a high-end one will take about 1 month.
If you only have a CPU to crack the hashes try something like the probable-top4800 wordlist from seclists. I made a tutorial on how to combine wordlists earlier, check that out if you want to know how to create your own awesome wordlist.
$ hashcat -m 22000 hashes.hc22000 ./lists/Super-WPA.gz -d 3
hashcat (v6.2.6-851-g6716447df+) starting

HIP API (HIP 6.1.40093)
=======================
* Device #1: AMD Radeon RX 6800 XT, skipped
* Device #2: AMD Radeon 610M, skipped

OpenCL API (OpenCL 2.1 AMD-APP (3614.0)) - Platform #1 [Advanced Micro Devices, Inc.]
=====================================================================================
* Device #3: AMD Radeon RX 6800 XT, 16256/16368 MB (13912 MB allocatable), 36MCU
* Device #4: AMD Radeon 610M, skipped

Minimum password length supported by kernel: 8
Maximum password length supported by kernel: 63
#cracking
Hashes: 41 digests; 41 unique digests, 16 unique salts
Bitmaps: 16 bits, 65536 entries, 0x0000ffff mask, 262144 bytes, 5/13 rotates
Rules: 1

Optimizers applied:
* Zero-Byte
* Slow-Hash-SIMD-LOOP

Watchdog: Temperature abort trigger set to 90c

Host memory required for this attack: 1471 MB

Dictionary cache built:
* Filename..: ./lists/Super-WPA.gz
* Passwords.: 982963903
* Bytes.....: 11539177677
* Keyspace..: 982963903
* Runtime...: 1 min, 2 secs

Cracking performance lower than expected?

* Append -w 3 to the commandline.
  This can cause your screen to lag.

* Append -S to the commandline.
  This has a drastic speed impact but can be better for specific attacks.
  Typical scenarios are a small wordlist but a large ruleset.

* Update your backend API runtime / driver the right way:
  https://hashcat.net/faq/wrongdriver

* Create more work items to make use of your parallelization power:
  https://hashcat.net/faq/morework

[s]tatus [p]ause [b]ypass [c]heckpoint [f]inish [q]uit => s

Session..........: hashcat
Status...........: Running
Hash.Mode........: 22000 (WPA-PBKDF2-PMKID+EAPOL)
Hash.Target......: hashes.hc22000
Time.Started.....: Sat Jun 29 20:32:02 2024 (30 secs)
Time.Estimated...: Sun Jun 30 00:58:44 2024 (4 hours, 26 mins)
Kernel.Feature...: Pure Kernel
Guess.Base.......: File (./lists/Super-WPA.gz)
Guess.Queue......: 1/1 (100.00%)
Speed.#3.........:   982.9 kH/s (8.95ms) @ Accel:128 Loops:32 Thr:256 Vec:1
Recovered........: 0/41 (0.00%) Digests (total), 0/41 (0.00%) Digests (new), 0/16 (0.00%) Salts
Progress.........: 28311552/15727422448 (0.18%)
Rejected.........: 0/28311552 (0.00%)
Restore.Point....: 1179648/982963903 (0.12%)
Restore.Sub.#3...: Salt:8 Amplifier:0-1 Iteration:3328-3360
Candidate.Engine.: Device Generator
Candidates.#3....: 06121170 -> 123gobeer
Hardware.Mon.#3..: Temp: 78c Fan: 55% Util: 99% Core:2175MHz Mem:1000MHz Bus:16

6e30ab8e01acdbf421b71d3d11f609eb:9c9d7b733e5a:2601dba14b9b:HackMeNetwork:Password!
[s]tatus [p]ause [b]ypass [c]heckpoint [f]inish [q]uit =>
I had to append the -d 3 parameter to select the correct device for cracking. Since I have more than one GPU and different APIs to interface with them, you probably don’t need to set this parameter.
Wait and if one of the wifi passwords is in your list, it will be displayed in this command line! In this example, the network with the SSID “HackMeNetwork” and the password “Password!” Very secure.

Customisation
Plugins
There are many plugins to add additional functionality to your Pwnagotchi. For example, show the battery level of your UPS on the screen, or add a GPS receiver to add coordinates to your recorded handshakes. There are also many third party plugins available, you can for example have a look here and here.
Case
The Pwnagotchi is pretty naked and vulnerable, it clearly needs a case. I went with this case, but there are many others available for 3D printing. Again, this is a DIY project, so if you don’t have a 3D printer you can go with a 3D printing service or look for cases on sites like Etsy or Tindie. A case should cost you about ~10€+shipping.
Antenna mod
The internal antenna of the Pi Zero is not very good. Many people modify their Pi to add an external antenna. This is a fairly complicated soldering job, involving soldering a tiny U.FL connector to the Raspberry Pi0 and cutting the internal antenna trace just behind it. It greatly improves reception, but I would only recommend it if you are good at soldering.
WebUI
Once you have connected to the Pwnagotchi (see Connecting to the Pwnagotchi above), you can also connect to the WebUI. Actually there are 2. The Pwnagotchi WebUI is on port 8080 and the Bettercap WebUI is on port 80. These are the default ports, you can change them in the config.toml.
Pwnagotchi WebUI
Navigating to the Pwnagotchi WebUI at http://10.0.0.2:8080/ will display a login box. The default login is changeme/changeme. This can be changed by adding these parameters to the config.toml file:
ui.web.username = "MyUsername"
ui.web.password = "TopSecretPassword"
Once logged in you will see the screen of your Pwnagotchi display and some extra options. This way you can even use the Pwnagotchi without a screen!
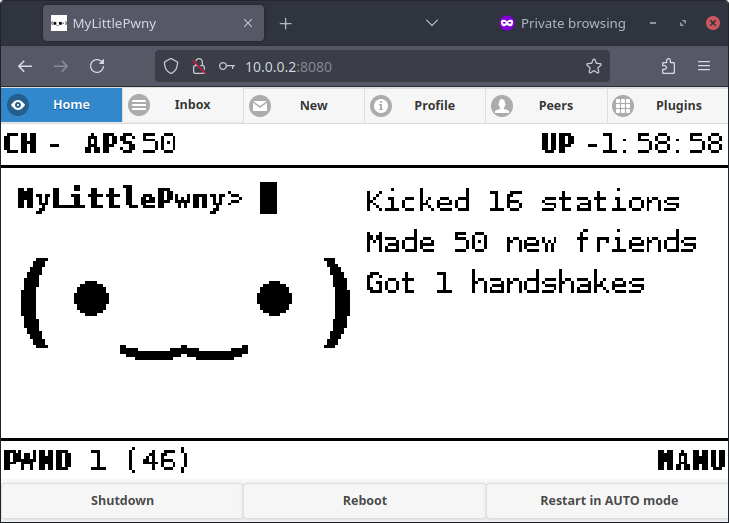
Other options include a way to send messages to other Pwnagotchis and enabling plugins.
Bettercap WebUI
Bettercap listens on port 8081, but you cannot connect directly to it. To access it you need to access port 80. So navigate to http://10.0.0.2:80/ to check out the Bettercap WebUI. The default login is pwnagotchi/pwnagotchi and can again by changed by adding some parameters to your config.toml:
bettercap.username = "MyUsername"
bettercap.password = "TopSecretPassword"
You’ll get a warning that the API is using an insecure connection, but that shouldn’t matter as it’s all on localhost anyway.
Conclusion
So, there we have it. My little guide to the Pwnagotchi. If there is anything you want me to add, ask in the comments, I try to look there regularly 😄.